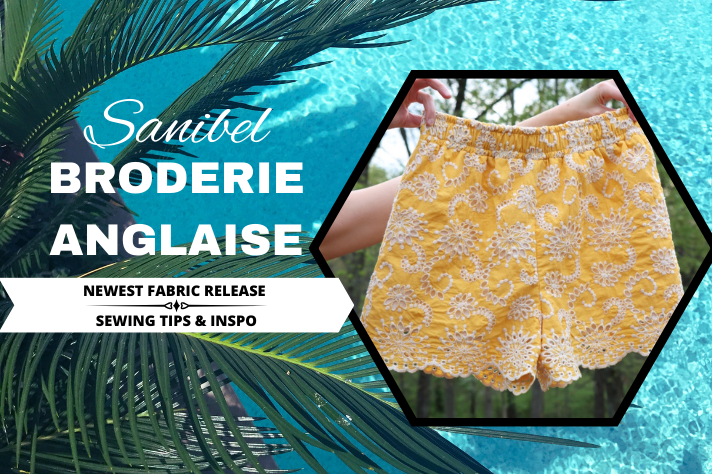
Fabric sourcing, when you have a pretty specific idea in your head, is much like finding a needle in a haystack. You know it's out there somewhere, but feels nearly impossible to find, until you do! This fabric, our new Sanibel Broderie Anglaise, was much like that needle, very very hard to find!
My search started a few years back after a shopping trip to the mall and seeing several beautiful bordered eyelet dresses. They were so very pretty! But what made them stand out to me was that they were in COLOR! The contrasting ivory thread against a beautiful buttery yellow fabric was utterly captivating to me! So my search for the fabric began.
When I finally found it, excitement was pulsing through me! Because this opened up so many garment making possibilities. One could use it for all their favorite patterns that they have perfected the fit on without facing the struggles of ill fitting RTW garments. Sometimes I succumb to this myself purely for the fabric, but now I won't have to and neither will you!
Of course bringing these in reignited my passion for sewing and I was quick to pull some yardage and cut into these beautiful fabrics! I've learned a lot in the process and I am here to share all the things that made working with this fabric easier for me!

First you, of course, need to prewash this fabric. It's 100% cotton and will shrink some in the initial wash. I washed on cold and tumbled dried on medium heat which worked out great. Be very careful about what you wash with these, anything with clasps and buckles can potentially catch on the embroidery, so just be mindful of that!

Before you start cutting your fabric, you'll want to identify the right side (top) from the wrong side (bottom). The embroidery on the right side will look slightly more consistent and appealing to the eye. There also may be some threads or knots on the wrong side.

The finished border is one of the most beautiful details of this fabric and you'll want to show it off at the hemline of your garment. While this fabric isn't super shifty, or difficult to control, I did find that pinning the scallops together at the peaks and shallows of the border made it easier to cut the fabric out on the fold.

You'll also want to take note that the side seams end at the same point in the border (at the peak or the shallow) so there is enough length on both edges to sew the seam.


While sewing I found having my walking foot engaged (I use a Pfaff and that is the black lever behind the presser foot) made a huge difference in the minimizing puckering and having to pull the fabric to keep an even seam. I also found that starting the seam with a little tissue paper prevented the fabric from getting pulled into the feed dogs.
Now let's dive into these samples shall we?

The first piece I made was the Les Perlines Evergreen Dress (up to 55" bust). I was looking for a beginner friendly pattern that would feel really approachable with a new fabric, and this for sure is it! The seam allowance built into the pattern was perfect for French seams and since I wasn't lining this one, that's what I opted for. I used our Parkville Cotton Linen to create the bias tape, but we have also brought some Wright's bias tape to the shop to make this step even easier.

When I first saw this fabric, I instantly thought shorts. The bordered hemline would make for such a cute detail on a simple pair of elastic waist shorts. So of course I had to test that theory! I used Friday Pattern Co Saugauro Set Pants (up to 67" hip) for this pair and made a 3.5" inseam. This fabric is sheer where the eyelets are and since I wanted them for everyday wear, I lined them with our Parkville Cotton Linen. It's a pretty lightweight fabric, but I think an even lighter one may have been better. Perhaps a rayon challis or cotton voile.

Lastly I made a Love Notions Caprice Skirt (up to 59.5" hip). This was another style that came to mind to make first with this fabric and I am so glad I didn't stray from that idea! I made view D, the tiered maxi view and then drafted a simple lining. Starting as the same width of the top tier and gently graded out to an a-line shape to accommodate for the hips. This skirt looks way more elegant than it ought to for how quickly it came together!
I know this post was a little long winded but I hope it leaves you feeling inspired (rather than overwhelmed) and ready to make something special with our new Sanibel Broderie Anglaise! If it does, and when you do create with it, please do tag us when sharing on Instagram or share with us in our private Facebook Group! I would absolutely love to see and celebrate your sewing wins with you!


Just what I was looking for! This fabric and your summer outfits definitely caught my eye to cool down our upcoming hot, hot summer! Thank you for bringing in these colorful fabrics and suggestions on outfits and helpful tips! My order is in!
I LOVE the shorts you made with this fabric!! Just like you, Ive been searching for a 100% cotton Anglaise. I cant wait to try this fabric out!
Would love to use this for an A-line midi length skirt – but the pattern hem is curved. Will it cause any issues with the way the skirt hangs if I change the hem to straight to use the embroidered edge? Thanks!
Thank you!